When I started dating Bryan he lived in a spacious studio apartment. It had everything the two of us needed-a bathroom, 1 bedroom, and a kitchen, all which totaled about 500 sq. ft. Now we reside in a small, very small 1,200 sq. ft. 2 bedroom apartment. It's funny how one small little baby can make your space seem so much smaller than before. His stuff is EVERYWHERE. Today for instance, as we were getting ready for a walk I said, "grab the stroller out of the bathroom, please." Yes, we store diapers, wipes, baby tubs, toys, clothes, and the stroller in our spare bathroom.
I am not much of a gardener. In fact I am quite sure that if I had flowers in my yard they would all die. However, I am a fan of gardens. The type that produces actual food. My great grandparents have had a garden for as long as I can remember. For as long as I can remember I did not appreciate all the fresh fruits and vegetables it produced. But since we have lived here the past 6 years I have really enjoyed having a garden all summer. It is so cost effective to have your own garden and I really enjoy cooking with vegetables that I know where they came from.
These two paragraphs seem to have nothing in common but the point I was trying to make is if I had a house with a yard I would definitely grow my own garden. Unfortunately my apartment is far too small to farm a garden every spring. I long for the days when we own our own house so that I can hoe my garden. For now though I must go to my grandmother's to get my garden fix.
Soup mixes are one of the great things that gardens produce. Grab every vegetable from the garden to make your own soup mix to freeze for the coming winter. Here in Kentucky it stays cold for a long time and warm soups are nice to have. Okra, potatoes, green peppers, onions, squash, tomatoes can all be cut up and canned or placed in freezer bags and stored in the freezer. You can cater the soup mixes to your taste as well by adding as much or as little as you want. When that cold air of winter creeps around just reach in your freezer (or cabinet if canned) and place in the crock pot. Add water and canned tomatoes for a delicious home made soup that is not only satisfying, but good for you.
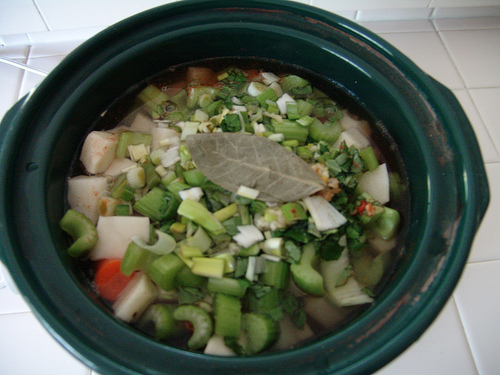
Another great plus of having a garden is all the tomatoes it produces. Admittedly I am not the biggest raw tomato fan. I do however love it in soups and sauces. I'll even eat a grilled tomato. I guess it's just something about the cold texture. Every year my great grandmother would boil and peel the tomatoes in order to can enough tomatoes until next spring. This is great because you have something fresh and homemade that doesn't take all that much effort. The cans you buy in the store are very convenient and loaded with sodium. You can use the canned tomatoes in soups, chili, and it makes a mean salsa.
If you don't have a garden another quick way to get fresh tomatoes is to buy them from the store. I always buy organic, but you can buy whatever you prefer. Tonight I made chili. I diced about 4 roma tomatoes and tossed another three in the food processor to make it into a liquid. I added that to my ground beef instead of a can from the store and seasoned it to my preference. An easy red Italian sauce can be made by blending your tomatoes in the processor with fresh garlic and basil. Add your own seasonings to taste (I prefer a little italian seasonings and pepper), heat it on the stove and serve over pasta.
Sunday, August 21, 2011
Oh Sweet, Sweet Summer, Where Have You Gone? A White Bean Salad Perfect Anytime
Hola my friends! I am quite sad that my summer is almost over. Not that I have to go back to school or anything, I just dread the whole 7-months-of-cold-weather thing. I do enjoy a little big of the cooler fall weather but after that I am ready for warmth again. Unfortunately all I get is cold, cold, cold.
The end of August brings a few fun milestones, some bittersweet. My birthday is on Tuesday. I am happily entering my late twenties (27) with open arms. I really don't mind aging as much as I thought I would. My baby boy just turned 4 months old yesterday! Four freaking months old! I am going to be a case of tears on his first birthday, I just know it. I feel like it was yesterday that that the doctor was telling me to "just push through the ring of fire". If you have already birthed a child naturally then you know what I'm talking about! If haven't yet experienced the joy of childbirth then you are quite lucky my friend.
My love has a birthday coming up on September 2nd and honestly I am looking more forward to his than mine. I have SO MUCH stuff planned for his birthday. I love birthdays. I always try to make my family's individual birthdays special. I always make a cake, a special dinner, balloons, and matching themed decorations, and his will be no different. I don't want to divulge too much information yet but I'm thinking a golf themed cake and rice crispy treats.
Many of you have already seen the pictures I had made of Bryson and I. The wonderful Ali Garey from Ali Ann photography took them. She is awesome and I highly recommend her. I absolutely cannot wait to give them to him. I am so happy that this time next year we will be MARRIED and no longer living in sin. I know my Meemaw is somewhere thanking God right now as she is reading this. I'll stop blabbing now and continue with the recipe I was going to share with you all before I got to talking.
I have had this recipe for a white bean salad made with tomato, basil, and garlic. It is so yummy. I have made it a few times for large family gatherings and holidays. It's pretty cheap to make too, especially if you grow your own basil and beans are about the cheapest protein you can buy.
Here lately I have been preparing this staple at home. I cut the recipe in half when I am making it for just a couple of people. Bryan is not a huge fan of raw tomatoes so I get the whole thing to myself:). I like to make this when I am making anything Italian. It goes great with pan-fried french bread, kind of like a bruschetta. I am doing a very low-carb diet so I even used it as a pasta substitute in my spaghetti the other night. At lunch today I still had some left over so I added a whole can of drained tuna fish to the leftovers and it was delish. I am even thinking of adding this yummy dish to my wedding menu...
Tomato, Basil, and, White-Bean Salad
serves 6
2 cans (19 oz each) cannellini beans, drained and rinsed
1/2 lb small roma tomatoes, cut into 1-inch pieces
1/2 cup fresh basil leaves, torn into 1-inch pieces
1 teaspoon salt
Pepper to taste
1/4 cup extra-virgin olive oil
1/4 red onion, chopped into 1/2 to 1 inch pieces
1.) Combine beans, tomatoes, basil, and salt in a bowl, and season with pepper
2.) Heat oil in skillet over medium heat. Add garlic, and cook, stirring, until fragrant but not browned. 1 1/2 to 2 minutes. Pour over bean mixture, and gently toss. Let stand 30 minutes before serving to allow the flavors to melt. Salad can be covered and kept at room temperature for up to 4 hours.
Friday, August 19, 2011
Whole Chicken: A Frugal Woman's Dream
Ok, Ok, so maybe the best adjective to describe me is definitely not frugal, but at least I try. To me being frugal means buying the cutest shirt at Forever 21 for 10 bucks and a bracelet to match for $3.80. Seriously though, if you are on a budget (and we try to be!) then a whole chicken is definitely for you and your family. I loved the bang it gave my buck so much I now have a whole freezer stockpile of medium-sized whole chickens. I go the extra buck or 2 and buy the organic, hormone and range-free chicken. I like to know that my chicken was treated fairly and able to roam free before she was humanely killed for my dinner table. If you don't really care about the treatment of your chicken then buy the cheapest one you can find.
My one chicken gave my enough meat for 3 meals PLUS 2 whole cups of chicken broth. A larger chicken would give you probably 4-5 cups. I don't have a large enough crock pot for a large chicken so I just bought a smaller one. Although you could probably bake a larger one in the oven and get the same results. I personally added store bought chicken broth because I wanted to make sure I got enough to make another recipe. It would have still yielded about a cup. You can use any seasonings/herbs you have on hand. Rosemary would be great with this chicken although I had no rosemary on hand. After we finished eating the chicken for dinner I pulled off the rest of the meat and made chicken salad AND Paula Deen's chicken casserole, which just happen to use 2 cups of homemade chicken broth:) and all for under 10 bucks. So Voila! A frugal woman's dream!
Ingredients:
1 whole chicken
2 TBSP cold butter, cut into thin slices
1/2 onion, sliced into 1-1 1/2 long pieces
2 TBSP chopped chives
Salt, pepper, garlic (and any other seasonings/herbs you want to use) to taste
Chicken broth (optional)
8 oz's of whole mushrooms
1. Turn a large crock pot on low.
2. Wash chicken and take out innards. Pat dry. Take 4-5 pieces of aluminum foil and loosely form into balls. Set in the bottom of crock pot. This is to elevate the chicken and it is supposed to make the skin more crispy.
3. Place chicken in crock pot and gently pull up the skin of the chicken without removing the skin. Place pats of butter under the skin along with 1/4 of your onion slices
4. Season the outside liberally (you can also carefully season under the skin), add chives, and place the rest of the onion slices on top. It is OK if some of the onion falls to the bottom of the pot.
5. You can leave your mushrooms whole or quarter them if you want. Place them in the bottom of the pan, along the sides of the chicken.
6. Pour a 1/2 cup to a cup of chicken broth in the bottom of the pan. This is optional. I wanted a moist, juicy chicken with lots of broth. Cook overnight or all day (at least 7 hours). Use leftovers to make chicken salad, casserole, or any other varieties of chicken dishes. Below is the recipe for Paula Deen's chicken casserole...
Paula Deen's Biscuit-Topped Chicken Cobbler
Serves 8-10 (again I cut recipe in half)
*Next time I prepare this recipe I will DEFINITELY cook the biscuits separately because I felt that it absorbed a lot of the casserole.
1/2 cup butter, divided
1 cup chopped celery
1 cup chopped carrots
1 cup chopped onion
1 (8-oz) package sliced fresh mushrooms
1 cup frozen peas, thawed (I omitted the peas)
2/3 cup all-purpose flower
4 cups reserved chicken broth
1/2 cup heavy whipping cream
4 cups reserved chopped cooked chicken
1 TBSP minced fresh thyme (omitted)
1 1/2 TSP salt
1 TSP black pepper
2 (7.5-oz) bags complete buttermilk biscuit mix
1 cup shredded parmesan cheese (I used 1/2 parm, 1/2 cheddar)
1 cup whole milk
1.) Preheat oven to 400*. Spray 13x9 inch baking dish with nonstick cooking spray.
2.) In a large skillet, melt 1/4 cup butter over medium-high heat. Add celery, carrots, onion, and mushrooms; cook 5-6 minutes or until tender; stir in peas. Set aside.
3.) In a large dutch oven, melt remaining 1/4 cup butter over medium heat. Add flour, and cook, stirring constantly, for 2 minutes. Add chicken broth, cream, whisking until smooth. Cook, whisking constantly, for 3-4 minutes or until mixture is thickened.
4.) Add reserved chicken, celery mixture, thyme, salt, and pepper to broth mixture. Spoon mixture into prepared baking dish.
5.) in a medium bowl, combine biscuit mix, cheese, and milk, stirring just until combined. Drop dough by heaping TBSP's onto cobbler (or baking dish if your want to cook separately). Bake for 18-23 minutes or until biscuits are golden brown and cobbler is hot and bubbly.
This recipe was seriously DELISH! The cheddar biscuits were amazing and they reminded me of the ones you get at Red Lobster.
My one chicken gave my enough meat for 3 meals PLUS 2 whole cups of chicken broth. A larger chicken would give you probably 4-5 cups. I don't have a large enough crock pot for a large chicken so I just bought a smaller one. Although you could probably bake a larger one in the oven and get the same results. I personally added store bought chicken broth because I wanted to make sure I got enough to make another recipe. It would have still yielded about a cup. You can use any seasonings/herbs you have on hand. Rosemary would be great with this chicken although I had no rosemary on hand. After we finished eating the chicken for dinner I pulled off the rest of the meat and made chicken salad AND Paula Deen's chicken casserole, which just happen to use 2 cups of homemade chicken broth:) and all for under 10 bucks. So Voila! A frugal woman's dream!
Ingredients:
1 whole chicken
2 TBSP cold butter, cut into thin slices
1/2 onion, sliced into 1-1 1/2 long pieces
2 TBSP chopped chives
Salt, pepper, garlic (and any other seasonings/herbs you want to use) to taste
Chicken broth (optional)
8 oz's of whole mushrooms
1. Turn a large crock pot on low.
2. Wash chicken and take out innards. Pat dry. Take 4-5 pieces of aluminum foil and loosely form into balls. Set in the bottom of crock pot. This is to elevate the chicken and it is supposed to make the skin more crispy.
3. Place chicken in crock pot and gently pull up the skin of the chicken without removing the skin. Place pats of butter under the skin along with 1/4 of your onion slices
4. Season the outside liberally (you can also carefully season under the skin), add chives, and place the rest of the onion slices on top. It is OK if some of the onion falls to the bottom of the pot.
5. You can leave your mushrooms whole or quarter them if you want. Place them in the bottom of the pan, along the sides of the chicken.
6. Pour a 1/2 cup to a cup of chicken broth in the bottom of the pan. This is optional. I wanted a moist, juicy chicken with lots of broth. Cook overnight or all day (at least 7 hours). Use leftovers to make chicken salad, casserole, or any other varieties of chicken dishes. Below is the recipe for Paula Deen's chicken casserole...
*The onions and mushrooms were soooo yummy cooked in the chicken's natural juices.
Paula Deen's Biscuit-Topped Chicken Cobbler
Serves 8-10 (again I cut recipe in half)
*Next time I prepare this recipe I will DEFINITELY cook the biscuits separately because I felt that it absorbed a lot of the casserole.
1/2 cup butter, divided
1 cup chopped celery
1 cup chopped carrots
1 cup chopped onion
1 (8-oz) package sliced fresh mushrooms
1 cup frozen peas, thawed (I omitted the peas)
2/3 cup all-purpose flower
4 cups reserved chicken broth
1/2 cup heavy whipping cream
4 cups reserved chopped cooked chicken
1 TBSP minced fresh thyme (omitted)
1 1/2 TSP salt
1 TSP black pepper
2 (7.5-oz) bags complete buttermilk biscuit mix
1 cup shredded parmesan cheese (I used 1/2 parm, 1/2 cheddar)
1 cup whole milk
1.) Preheat oven to 400*. Spray 13x9 inch baking dish with nonstick cooking spray.
2.) In a large skillet, melt 1/4 cup butter over medium-high heat. Add celery, carrots, onion, and mushrooms; cook 5-6 minutes or until tender; stir in peas. Set aside.
3.) In a large dutch oven, melt remaining 1/4 cup butter over medium heat. Add flour, and cook, stirring constantly, for 2 minutes. Add chicken broth, cream, whisking until smooth. Cook, whisking constantly, for 3-4 minutes or until mixture is thickened.
4.) Add reserved chicken, celery mixture, thyme, salt, and pepper to broth mixture. Spoon mixture into prepared baking dish.
5.) in a medium bowl, combine biscuit mix, cheese, and milk, stirring just until combined. Drop dough by heaping TBSP's onto cobbler (or baking dish if your want to cook separately). Bake for 18-23 minutes or until biscuits are golden brown and cobbler is hot and bubbly.
This recipe was seriously DELISH! The cheddar biscuits were amazing and they reminded me of the ones you get at Red Lobster.
Ham and Spinach Strata!
I try to keep things simple over at my house. There are a few things I have found while experimenting in the kitchen the past few years; lesson 1) if it seems too complicated it probably is. For example, I tried to make this eggplant parmesan recipe I found in my SHAPE magazine recently. It said "soak your eggplant in water for 30 minutes and then let dry on paper towels. Then dredge one side in bread crumbs....". Being that I am not really even a huge fan of eggplant I decided to just stop there and not even continue to read any further. I didn't like eggplant enough to let it soak in water.
2) Some things are better in a package. Case in point: While watching Buddy cook banana pudding on Kitchen Boss I decided that I wanted to try. Long story short I ended up making the banana pudding FROM SCRATCH and ended up in tears both times. I whisked that stupid pudding for like 30 minutes (he only did it for 4-5 minutes) and it STILL wasn't thickened. Basically the box pudding is quick, easy, good, won't make you cry, and will save 4 hours trying to make it from scratch.
3) Just keep it simple. I feel like the meals that save me time and money are sometimes my best meals. I tried to make crab cakes one time from scratch and failed miserably. I spent about, oh, 40 big ones trying to make them too. I cried that night too. BUT I was 6 months preggo so at least I had an excuse...
I constituted all my rules cooking tonight's meal-a ham and spinach strata. I'll first start with the definition so that you can better understand the foundation of a strata if you have never heard of one (my Meemaw had not).
Strata:
1. A layer or series of rocks in the ground.
2. A thin layer within any structure.
3. A very yummy breakfast casserole consisting of eggs and bread.
Basically my ham and spinach strata consists of layers of some of my favorite foods-ham, onions, cheese, garlic, and of course, bread and eggs. I prepared it the night before and stored it in the fridge until I was ready to cook it for dinner. It would be a great breakfast dish too (obviously). This recipe is a good frugal staple and would be a great meal prepared from holiday leftovers, like turkey or ham and day-old bread. I love meals that are quick, can be prepared ahead of time, and only consist of ONE dish to wash afterwards:).
The beauty of this dish is the fact that you can pretty much put any vegetable, cheese, bread, and meat combo in it. I used what was in my fridge which was onions, spinach, cheese, and ham. I personally used a little more bread and cheese than the recipe called for. Paula Deen says that you should always follow a new recipe to the T the first time you make it and then experiment the second time around. I always try to stick to my recipe but I always add a little more of my favorite ingredients than the recipe calls for. I say if you really love a certain food then you can never have enough! Here is the recipe. I hope you enjoy!
Ham and Spinach Strata
Serves 8-10
1 TBSP butter, unsalted (room temp)
10 large eggs
2 1/2 cups of whole mild
1 TBSP Dijon mustard
1 TSP chili powder
1 TSP salt
Pepper to taste
1 loaf of bread (preferably day old bread), cut into 1-inch pieces
1 lb ham (deli or holiday), cut into bite-sized pieces.
1 medium-sized onion, diced
2 cups of washed spinach, torn into 1 inch pieces
8 ounces pepper jack cheese, shredded
Directions:
Heat oven to 350*
1. Place bread on a baking sheet and bake for 10 minutes or until lightly toasted.
2. Butter a 2 1/2 to 3-quart baking dish. In a large bowl, whisk together eggs, milk, chili powder, salt, pepper, and Dijon. Add bread when done baking.
3. Cook onions in a skillet on medium heat until tender. Add spinach towards the end and cook until spinach is soft and wilted.
4. Add onions, spinach, and ham to egg mixture and mix well.
5. Carefully pour mixture into greased baking dish. Cover and refrigerate overnight (or at least a few hours).
6. Pre-heat the oven to 350*. Pull Strata out of fridge and let sit for 15 minutes. Bake the strata, uncovered, until puffed and lightly golden brown, about 1 hour to 1 hour and 20 minutes. Let rest for 5 minutes before serving.
* I cut recipe in half but added 1 more egg (6 total) and about a half loaf of bread.
2) Some things are better in a package. Case in point: While watching Buddy cook banana pudding on Kitchen Boss I decided that I wanted to try. Long story short I ended up making the banana pudding FROM SCRATCH and ended up in tears both times. I whisked that stupid pudding for like 30 minutes (he only did it for 4-5 minutes) and it STILL wasn't thickened. Basically the box pudding is quick, easy, good, won't make you cry, and will save 4 hours trying to make it from scratch.
3) Just keep it simple. I feel like the meals that save me time and money are sometimes my best meals. I tried to make crab cakes one time from scratch and failed miserably. I spent about, oh, 40 big ones trying to make them too. I cried that night too. BUT I was 6 months preggo so at least I had an excuse...
I constituted all my rules cooking tonight's meal-a ham and spinach strata. I'll first start with the definition so that you can better understand the foundation of a strata if you have never heard of one (my Meemaw had not).
Strata:
1. A layer or series of rocks in the ground.
2. A thin layer within any structure.
3. A very yummy breakfast casserole consisting of eggs and bread.
Basically my ham and spinach strata consists of layers of some of my favorite foods-ham, onions, cheese, garlic, and of course, bread and eggs. I prepared it the night before and stored it in the fridge until I was ready to cook it for dinner. It would be a great breakfast dish too (obviously). This recipe is a good frugal staple and would be a great meal prepared from holiday leftovers, like turkey or ham and day-old bread. I love meals that are quick, can be prepared ahead of time, and only consist of ONE dish to wash afterwards:).
The beauty of this dish is the fact that you can pretty much put any vegetable, cheese, bread, and meat combo in it. I used what was in my fridge which was onions, spinach, cheese, and ham. I personally used a little more bread and cheese than the recipe called for. Paula Deen says that you should always follow a new recipe to the T the first time you make it and then experiment the second time around. I always try to stick to my recipe but I always add a little more of my favorite ingredients than the recipe calls for. I say if you really love a certain food then you can never have enough! Here is the recipe. I hope you enjoy!
Ham and Spinach Strata
Serves 8-10
1 TBSP butter, unsalted (room temp)
10 large eggs
2 1/2 cups of whole mild
1 TBSP Dijon mustard
1 TSP chili powder
1 TSP salt
Pepper to taste
1 loaf of bread (preferably day old bread), cut into 1-inch pieces
1 lb ham (deli or holiday), cut into bite-sized pieces.
1 medium-sized onion, diced
2 cups of washed spinach, torn into 1 inch pieces
8 ounces pepper jack cheese, shredded
Directions:
Heat oven to 350*
1. Place bread on a baking sheet and bake for 10 minutes or until lightly toasted.
2. Butter a 2 1/2 to 3-quart baking dish. In a large bowl, whisk together eggs, milk, chili powder, salt, pepper, and Dijon. Add bread when done baking.
3. Cook onions in a skillet on medium heat until tender. Add spinach towards the end and cook until spinach is soft and wilted.
4. Add onions, spinach, and ham to egg mixture and mix well.
5. Carefully pour mixture into greased baking dish. Cover and refrigerate overnight (or at least a few hours).
6. Pre-heat the oven to 350*. Pull Strata out of fridge and let sit for 15 minutes. Bake the strata, uncovered, until puffed and lightly golden brown, about 1 hour to 1 hour and 20 minutes. Let rest for 5 minutes before serving.
* I cut recipe in half but added 1 more egg (6 total) and about a half loaf of bread.
Monday, January 17, 2011
Baked Tilapia!
I wasn't planning on blogging about the dinner I cooked tonight, but it was so good I just had to share my recipe. I bought fresh tilapia from Whole Foods Market when it was on sale the other day. I coated it with cracker crumbs, parmesan cheese, salt, pepper, parsley, and garlic. I served it with some yummy risotto, steamed broccoli, and twice baked potatoes. I normally wouldn't serve 2 starches in one meal, but my fiance can put away some food! He doesn't even call it a meal if it doesnt have at least one meat, starch, vegtable, salad, and bread.
Heat oven to 350-375
3 pieces of tilapia
1/2 package of crackers
1/4 cup parmesan cheese
salt/pepper
garlic powder
parsley flakes
2 eggs (beaten)
1/4 lemon
flour
2-3 tablespoons butter (melted). You can subsitute olive oil for butter. For my filet I omitted this step for personal dietary preferences.
1. crush package of crackers into crumbs and place into a sandwich bag
-add parmesan
-salt/pepper
-garlic powder
-parsley flakes
Shake ingredients up and then pour into a dish that is at least 1 inch deep
2. beat 2 eggs
-add lemon juice
(can add milk/buttermilk if desired)
-place into a dish that is at least 1 inch deep
3. place about 1/8 cup flour onto a separate plate
4. form an assembly line-flour first, then egg wash, and last should be the bread crumbs
5. cover counter space with seran wrap (easy cleanup)
6. unwrap each filet and season with salt pepper
7. lightly coat with flour
8. dip into egg wash, cover entire fliet, but make sure you let excess wash drip off
9. dip into cracker mixture, using your hands to fully coat tilapia
10. repeat steps 8 and 9 and then place onto pan
11. bake until fish turns white and flakey (10-20 minutes depending on oven and preference of doneness). Check on fish and right before it reaches desired doneness pour butter mixture on top of each filet. Let it broil unti the crust on fish turns a golden brown.
12. Remove from oven and serve with desired sides.
Yummy!
Heat oven to 350-375
3 pieces of tilapia
1/2 package of crackers
1/4 cup parmesan cheese
salt/pepper
garlic powder
parsley flakes
2 eggs (beaten)
1/4 lemon
flour
2-3 tablespoons butter (melted). You can subsitute olive oil for butter. For my filet I omitted this step for personal dietary preferences.
1. crush package of crackers into crumbs and place into a sandwich bag
-add parmesan
-salt/pepper
-garlic powder
-parsley flakes
Shake ingredients up and then pour into a dish that is at least 1 inch deep
2. beat 2 eggs
-add lemon juice
(can add milk/buttermilk if desired)
-place into a dish that is at least 1 inch deep
3. place about 1/8 cup flour onto a separate plate
4. form an assembly line-flour first, then egg wash, and last should be the bread crumbs
5. cover counter space with seran wrap (easy cleanup)
6. unwrap each filet and season with salt pepper
7. lightly coat with flour
8. dip into egg wash, cover entire fliet, but make sure you let excess wash drip off
9. dip into cracker mixture, using your hands to fully coat tilapia
10. repeat steps 8 and 9 and then place onto pan
11. bake until fish turns white and flakey (10-20 minutes depending on oven and preference of doneness). Check on fish and right before it reaches desired doneness pour butter mixture on top of each filet. Let it broil unti the crust on fish turns a golden brown.
12. Remove from oven and serve with desired sides.
Yummy!
Wednesday, January 12, 2011
Smashing Tomato
I am taking a break from blogging about weddings to blog about food, and not just any food, but one of my favorite restaurants in Lexington-Smashing Tomato. I love this place. Seriously. It is some of the best pizza I have had. My fiance's friend, Ben, who has lived in Italy for a few years, says that Smashing Tomato has the most authentic Italian pizza in the states. They use some authentic Italian style wood-burning stove that bakes their pizza to perfection. Their Neopolitan style pizzas range from their Margherita, topped with fresh basil and imported buffalo mozzerella, to one of my favorites, the Quatro Formaggi (4 cheese). This pizza is loaded wtih mozzarella, provolone, pecorino, and gorgonzola.
Smashing Tomato doesn't just stop there with pizza; they also feature two amazing salads. One is a ceasar and the other, my favorite, is a chopped salad loaded with fresh romaine, red onion (I love red onions), walnuts, parmesean cheese, and then topped with their balsalmic dressing. On the side comes a yummy piece of bread that is pretty much a pizza crust with no toppings. I try to not touch it (sometimes that doesn't work), but it works great as a tool to help you shovel the crisp salad into your mouth. If you go wtih a a friend or a group then I would recommend trying their hot artichoke dip as a starter. This hot and creamy dip is delicious on their freshly baked bread. Oh, and the best part about this place? You don't have to tip. It's kinda like a Panera Bread with pizza. Make sure you go before 3 p.m. You get the lunch special with a small pizza and salad for $5.99. I already know where I'm headed for lunch tomorrow:).
http://smashingtomato.com/
Smashing Tomato doesn't just stop there with pizza; they also feature two amazing salads. One is a ceasar and the other, my favorite, is a chopped salad loaded with fresh romaine, red onion (I love red onions), walnuts, parmesean cheese, and then topped with their balsalmic dressing. On the side comes a yummy piece of bread that is pretty much a pizza crust with no toppings. I try to not touch it (sometimes that doesn't work), but it works great as a tool to help you shovel the crisp salad into your mouth. If you go wtih a a friend or a group then I would recommend trying their hot artichoke dip as a starter. This hot and creamy dip is delicious on their freshly baked bread. Oh, and the best part about this place? You don't have to tip. It's kinda like a Panera Bread with pizza. Make sure you go before 3 p.m. You get the lunch special with a small pizza and salad for $5.99. I already know where I'm headed for lunch tomorrow:).
http://smashingtomato.com/
Monday, January 10, 2011
Candy bars...not the Hershey kind
I love this idea. It is probably one of the things I am most exicted for regarding my upcoming wedding ceremony. I am on a mission to find cute mismatched apocathary jars to house the many pounds of candy I will need to feed 150 guests. Of course all of the candy I use will match my wedding colors. I came up with this idea as I was trying to comeup with ideas for wedding favors. I thought this was a cute idea and I can't wait to see it in action!
Subscribe to:
Posts (Atom)