Tuesday, November 8, 2011

Asian-Style Ramen Noodle Coleslaw


My mother-in-law makes this very yummy Asian-style substitute for traditional coleslaw. It omits the mayo and instead substitutes oil. In my heart-of-hearts I would like to believe that this version is much healthier, when in fact, I know better. This recipe can fetch up to 548 calories per serving, leaving me on a mission to health it up a bit.

I had been wanting this recipe for quite some time. I am not a fan of mayo in anything (I often substitute non-fat sour cream for dishes like chicken salad or potato salad), so I decided that this recipe was right up my alley. I found a few recipes online, compared them, and they were pretty much the same.

The recipe calls for oil so naturally I used olive oil. Olive oil is good for you, but like most things, only in small portions. The oil coated the slaw very lightly, which made me feel less guilty. The recipe called for the whole seasonings packet that comes with the Ramen Noodles. Knowing this is LOADED with sodium, which retains water, I only used about 1/4 of the packet. I also omitted the salt because I felt like it would be salty enough with the Ramen packet. Probably one of the biggest changes I made to this recipe is the fact that I used honey instead of a 1/4 cup of sugar, and I only used about 2 tablespoons, if that. Everything else in the recipe is the same, except I did not have any sesame seeds on hand.

After I mixed up my slaw and took a bite I was so happy that I altered the recipe. I felt that I was left with a great flavor, and I did not feel that I sacrificed calories for flavor at all. The next time I make this recipe (which will be soon as I have a lot of slaw left) I will try to put together a seasonings packet on my own that will allow me to cut even more sodium out of the recipe. Tonight I am going to serve this with hamburgers.


Salad
4 green onions, chopped (use less or more desired on taste)
1 (6 oz) bag of cole slaw mix
3 TBSP toasted sesame seeds
1 cup toasted almonds
1 packet Ramen Noodles, broken into small pieces

Dressing
1/4 cup oil
3 TBSP white vinegar
2 TBSP honey
1/2 TSP pepper
Seasoning packet (reserved from Ramen)

Mix salad ingredients in a a large bowl, remembering to crumble the Ramen first.
Mix dressing ingredients in separate bowls.
Pour dressing over salad mixture and refrigerate for a couple hours for best results.

Saturday, November 5, 2011

Skinny Crock Pot Balsamic Chicken

As you might have read before, I am a FOOL for my crock pot. Seriously. I. Love. It. I actually wish I had two, but I guess I should be thankful I have one, right? I made this recipe the other night from a recipe I found via Pinterest.com, a website I have recently found and am highly addicted to. I am quite sure that a coke habit would be cheaper.

Anyways, recently while vacationing in Hilton Head, I found myself in the a shop called Oilerie. It is an awesome little shop where you can sample various kinds of olive oils and seasonings before buying. THey also bottle and seal all products while you are there. Though I am a fool for some olive oil, their claim to fame is their balsamic vinegar that is aged for 25 years. It is so sweet you could almost drink it. It doesn't have the bitterness that many of the store-bough balsamic vinegars have. Since I have purchased this I have been looking for recipes that call for balsamic vinegar. You can purchase their products by clicking the link below.
Oilerie

This recipe was super quick to make. I made a few tweaks to the original recipe to accommodate what I had on hand, saving me a trip to the dreaded WalMart. I pulsed the canned tomatoes in the blender just for a few seconds because Bryan nor I like whole tomatoes. I also forfeited the herbs because I simply did not have any on hand. I just used Italian seasonings and extra garlic. I also used pork instead of the chicken because I unthawed it by accident. It actually turned out great and the pork was very tender. I will try chicken next time though.
I found this recipe at:
http://skinnycrockpot.com

4-6 boneless, skinless, chicken breasts (or pork, cut thin)
1 large 28 oz can diced tomatoes
1 medium onion, thinly sliced (I diced mine)
4 cloves garlic, chopped
1/2 cup balsamic vinegar
1 tbsp. olive oil
1 tsp each: dried oregano, basil, rosemary
1/2 tsp thyme
Salt and pepper to taste

Directions:
Pour olive oil in bottom of crock pot. Salt and pepper each chicken breast and place in crock pot. Add onion, garlic, and herbs on top of chicken. Pour vinegar on top and then top with tomatoes.
Cook on high for 4 hours, serve over pasta (I had thin pork cutlets that I cooked on high for 2 hours and then turned to low).
Pork, onions, garlic, seasonings

Add the balsamic

Top with tomatoes

After 2 hours of cooking on high
I served with cheese-filled tortillinis

Cauliflower Pizza Crust

I found this amazing recipe for a pizza that crust that has little to no carbs in it! Yes, it is made with cauliflower, BUT if you are trying to be healthy then it's a small price to pay, right?

I have not tried this recipe yet, but I plan on stocking up on cauliflower at Whole Foods tomorrow. I plan to make this pizza plus some cauliflower mashed potatoes this week. I know Bryan will be super stoked to hear this.

I just wanted to go ahead and share the recipe with you all and I plan on posting pictures when I do make it.

I got this recipe from eat-drink-smile.com and you can find the recipe by clicking the link below...
Cauliflower Pizza Crust

Wednesday, October 19, 2011

Crock Pot Spaghetti and Meatballs


I have been a lazy cook the past few days and my crock pot hasn't had a break, just a quick path between uses. I prepped tonight's dinner last night by browning my meatballs in a large skillet and chopping my onion. I am all about prepping ahead just to cut out some time the next day. I often prep all my vegetables (cut, chop) the night before and store them in Tupperware containers so that all I have to do the next day is open the containers and toss into the recipe. A little prep goes a long way and makes putting the whole meal together that much easier.

The prep for this meal actually started on Monday night. I mixed 1 lb of meat with 1 cup of bread crumbs and 3 eggs. I used 1/2 cup of store bought bread crumbs that I had toasted for another recipe a week ago and I used 1/2 cup specially made for Italian meatballs that I bought at this little country store. I covered it and put it in the fridge overnight to really let the meat soak up the bread crumbs and eggs.

Last night I browned them in a large skillet and allowed them to cool before I put them back in the fridge. This morning I filled up my crock pot with 2 jars of Bertolli spaghetti sauce (you can use any kind). I will cook it for about 6 hours on low and serve it with spaghetti and salad.

1 LB lean ground beef (I used 85% organic)
3 eggs
3 cloves of garlic (minced)
1 cup Italian-style bread crumbs
2 jars spaghetti sauce
1 small onion (optional)
1 green pepper (optional)
Salt and pepper to season

In a large mixing bowl combine beef, eggs, bread crumbs, garlic, and salt and pepper. Mix well and cover with plastic wrap and refrigerate over night.
The next morning roll beef into 1-1 1/2 inch meatballs. Put some olive oil in a large skillet and brown on medium-high heat.
If you do this in the evening you can refrigerate one more night at this point.
Turn large crock pot on low and pour spaghetti sauce and veggies in. If you refrigerated your browned meatballs overnight you want to remove them about 30 minutes before you place them in the pot. If not, they can go right from the browning skillet to the pot.
Cook on low all day and serve with spaghetti and garlic bread (or in my case spaghetti squash and no bread).

Crock Pot Weight Watchers Chili


I made this WW chili recipe that I found on my new favorite website, Pinterest.com. I have been an arts and crafts making fool this past week thanks to my new obsession with the website. I have a few more recipes I am going to post here soon. It's been a great couple weeks having Bryan home from work. The circumstances were less than favorable (truck needed new transmission/engine), but I love him and I love spending time with him.

This recipe is great if you are following the Weight Watchers diet. I am just trying to eat a clean, healthy diet so I figured that this would be a great recipe. Bryan, who is definitely not dieting, enjoyed it as well. Basically this recipe would be great for anyone who likes a good chili, not too heavy but just right.

If you don't have chicken on hand you could easily use a lean ground beef or turkey.

*I lost the website link I got this recipe from so this is from memory...

3 chicken breasts (I used 2 cups of diced chicken I had frozen)
1 can black beans, drained
1 can kidney beans, drained
1 small onion, diced
2 cans chilis and tomatoes (I only had one on hand)
2 cans of tomato sauce (I used 1 can of diced that I liquified in the blender PLUS about a cup of water to make up for the extra liquid)
1 can of corn (you can also roast a couple ears of corn on the grill or in the oven)
1 packet low-sodium taco seasoning
chili powder to taste (I used about 1 tablespoon)
salt and pepper to taste (I also added a little bit of garlic powder)
Cilantro (garnish)
Sour cream (garnish)
Cheese (garnish)(I used light)
Rice

Combine all ingredients (except chicken) and combine well in crock pot. Pound out chicken breasts and put in the crock pot.
Cook on high for 4 hours or on low for 8 hours (I cooked on high for a couple hours and low for a couple hours).
A few hours into cooking your chicken should be done. Remove it from the chili, let cool, and then shred and place back in chili.
If you are using shredded chicken like I did throw into mix about an hour before serving.
Garnish with fresh cilantro, sour cream, cheese, and rice (optional).

ENJOY!

Wednesday, September 14, 2011

Jerk Your Chicken

Hey y'all! In the car and on my way to Hilton Head CHILD FREE thanks to my lovely in-laws. I just discovered this blogger app that allows me to blog on the go.

A few nights a go I made this Jamaican jerk chicken dish. This recipe is great for company and quite the frugal recipe. I used boneless chicken thighs which really give you a lot of bang for your buck. I got 2.5 LBS for about $5.50. They are more fatty than boneless chicken breasts, but I just used some scissors to trim the fat off the chicken. You could really use any type of chicken meat you would like. If your comfortable enough with a whole chicken you can cut it up and use it for this recipe as well.


I marinated the chicken for 2 whole days in the fridge. The yummy marinade was made up of green onion, Serrano peppers, garlic, lime, and all spice. There are many varieties on jerk chicken. You can use oregano and Thyme, I just didn't have any on hand. Jamaicans actually cook this recipe over an aromatic fire, often flavored with pimento-smoked logs. I, of course, just used my handy flat-top grill. If you don't have one of these you can cook them in a large skillet or even in the oven. You can also make this recipe with pork or fish.


I really enjoyed making and eating this dish. The marinade was not quite like anything I have ever marinated my chicken in. My only negative is that it wasn't very hot at all. I omitted the Scotch Bonnet chili peppers the recipe originally called for because my store did not carry them. I used Serrano instead. Next time I will try to locate the Scotch Bonnets for a more authentic flavor. The Serranos were perfect though of you prefer something mild. I like it hot though!


Serves 4
2 1/2 lbs boneless chicken thighs, trimmed of fat
2 big bunches green onion, chopped
2 cloves garlic, minced
1 TSP all spice
2 Serrano peppers or Scotch Bonnet chilies, seeded and chopped fine (if you like it real spicy don't de-seed).
1/2 cup water
Juice from 1 lime
1 TBS salt
Pepper

Combine all ingredients except chicken and water in a large bowl.
Reserve about 1/2 cup to pour over chicken after it is cooked. It is important to do this BEFORE you add
The chicken.
Add chicken and water. Add water to preference. You don't want it too watery. Remember, natural juices from the chicken will come out too.
Cover with Saran wrap and a lid. Marinate for at least an hour, but preferably 24 hours and no longer than 48.

When you are ready to cook, heat flat-top to high and let get very hot.
Spray with non-stick or canola/vegetable oil.
Cook about 20 minutes, flipping once around 10 minutes, making sure that it is cooked throughout, no pink.
You can cover with extra marinate before flipping.

Cilantro-lime rice (tastes like Chipolte's rice)
-from Allrecipes.com
1 cup long-grain white rice (I used a brown rice variety because it's healthier)
2 cups water
1 tbsp butter
1/2 cup cilantro
Juice and lime zest from one whole lime.

Boil water and add rice, cook until tender. I added some chicken stock too.
Add butter, cilantro, lime-zest, and lime juice.
Serve while hot

I served mine with grilled pineapple, baked beans, and cilantro-lime rice.


Thursday, September 8, 2011

Oreo Temptation and Italian Marinated Chicken

Oreo Temptation. No, it's not a dessert, it's what's going on in my house right now. Last night I was feeling awfully vulnerable as I walked by the unnecessarily large Oreo cookie display. Normally I would walk right on by without blinking an eye; it's a well-known fact that I never keep sweet snacks in the household. I could easily gorge myself for breakfast, lunch, and dinner on sweet treats.

I remember one time when I was a teenager we were on vacation, and we stopped in West Virginia to eat dinner at this really nice restaurant that was located in some old historic building. I am quite sure the menu had all kinds of expensive cuts of meat served a la carte and yummy homemade sides to compliment. I wasn't interested. I immediately spotted the dessert bar and about knocked down anyone in my path to pile my plate high with chocolate. That's what I had for dinner. That's what I wish I could have for dinner every night. But then I always remember I was born with the slowest metabolism ever. So I eat lettuce instead.


Ok, back to the Oreo story. I was walking by the forsaken Oreo display and remembered the double-stuffed Oreo I had eaten at my in-laws the previous day. I also remembered how yummy it was. I picked up a box of classic Oreos and thought what's one little box of Oreos going to hurt? Some people have a conscious that tells them not to do bad things. My conscious tells me not to eat bad things. Sometimes I don't listen. I didn't listen this time. I knocked that little sucker off my right shoulder and I'm pretty sure she fell into the bin of produce behind me. That's another thing, why would you put an Oreo display in the produce section? I mean here I am minding my own business, innocently picking out some corn on the cob, when I am bombarded by the freaking Oreo display. Now they sit in my cabinet calling my name in a not-so-subtle annoying way. I am just hoping Bryan eats them all tonight and I can wipe my hands of them. For the record I have only eaten 4 Oreos in the past 16 hours.
.
On to the feature piece of this blog post. I am hoping it will keep my mind off those Oreos for at least 10 minutes. I am all about saving time for dinner. I often plan ahead and prepare all of or some of my meal the night before. This makes dinner so much easier the next day. I highly recommend this to working families. A little prep the night before makes dinner the next day a breeze. You don't always have to use the crock pot for easy make-ahead recipes. I make a yummy homemade marinade made with olive oil and red wine vinegar for this dish. I spice it up with some red pepper flakes. You can use the store bought Italian dressing but it's SO EASY to make your own, so why not?
I love to cut up chicken and marinate them for 12-24 hours. Really you can marinate any cut of meat overnight. I also love to marinate meat for fajitas. This chicken recipe is super easy. Anyone can do it. You can use fresh chicken or frozen (unthawed first). I used organic chicken from Whole Foods that I had frozen a while back. I always buy in bulk and freeze. It's cheaper and convenient, plus it saves time. I always pound out my chicken before I freeze to make things easier.

First I prepare the marinade for the chicken to go in. I always just make it in the glass dish the chicken will marinate in overnight. Feel free to double the marinade for more people or if you just want more marinade for your chicken. After my chicken has unthawed I cut it up into small strips. Remember to always use scissors are only designated for poultry. The same goes for cutting boards. Chicken bacteria is easily spread. I actually bought a plastic basket at the dollar store that holds my chicken while it is in the sink. I set my chicken in here so it doesn't slide all over the place. I don't like to set my chicken in the sink. I always make sure I clean the area super good afterwards. I also wash my hands a lot during the process.

When I am done cutting the chicken into strips I place it into the glass dish, cover with saran wrap and a lid, and place in the refrigerator. You can marinate for an hour or so but I always like to make sure I marinate over night. I feel like it makes the flavor that much more intense. Now you can bread this chicken afterwards or you can bake it as is on a baking dish. I always like to use a rack so air gets underneath the chicken. This is especially important if you used bread crumbs. It makes the chicken more crisp if you are baking in the oven, and more importantly, it is healthier.
This picture is after the chicken had been marinated for about 20 hours. I was going to post a pic of the end result, but sometimes things get a little crazy around here with me being a mom and all. I get distracted and forget to take pictures! I promise I'll get better at remembering to take pictures all the way down to the end result;).


Italian Marinade
Lucinda Scala Quinn (Mad Hungry)
Serves 2 (feel free to double or triple)
Pre-heat oven to 350*

2 chicken breasts, thawed and cut into strips
2 cloves minced garlic
1/4 cup olive oil
1/4 cup plus 1 TBSP red wine vinegar
1/2 TSP salt
1/2 TSP dried oregano (or Italian seasonings)
1/4 TSP red pepper flakes

1) Prepare above ingredients into medium-sized baking dish
2) Add chicken and let marinate for at least an hour (up to 48 hours)
3) When you are ready to eat set the chicken out on the counter for up to an hour
4) Use tongs to place chicken on a wire-rack baking sheet lined with parchment paper. Use a spoon to add extra marinade to chicken if desired
5) Bake in pre-heated oven for 20-25 minutes or until juices are clear and chicken is not pink

If you prefer to bread your chicken follow these steps after step #3 above...

Chopped parsley (or dried)
1 cup bread crumbs (I usually use 1/2 Italian, 1/2 regular)
1 clove crushed garlic
1/4 tsp black pepper
1/4 cup parmesan cheese
1/4 cup romano cheese

1) In a flat dish combine above ingredients
2) Line baking sheet with parchment paper
3)Lightly dredge chicken in bread crumb mixture and lay on pan
4) Bake for 25-30 minutes or until chicken is completely done


Monday, September 5, 2011

Lucinda's Upside-down Pineapple Cake

If you are lucky enough to be not doing anything at 11 am then you must start watching Lucinda Scala Quinn's Mad Hungry on the Hallmark Channel. Or you can just DVR it and watch it when you wake up at noon like I do;). If you like to cook but think you aren't very good at it then Lucinda is the girl for you. Her recipes are easy, simple and delicious. I make a recipe from almost every one of her shows that I watch. I started out Bryan's birthday last week with this yummy pineapple upside down cake. It was so simple even a small child could follow this recipe.

In this particular episode she talked about cooking with cast iron skillets. This immediately caught my interest because my great-grandmother has had the same cast iron skillet since Lincoln was in office. This thing is ancient. I tried to steal it from Meemaw's but she said she uses it occasionally. I really like the idea of using cast iron because it kind of has it's own flavor to it depending on what you cook in it. I also learned that you are never supposed to wash it with water and soap. You are supposed to wash it while it is still warm on the stove with salt and a little oil. You clean it with a paper towel until all the salt is gone and then you are left with a seasoned skillet that is slick as a skating rink for your next meal.


Lucinda's blog and website...
http://blog.madhungry.com/

Pineapple Upside-down Cake
1 1/3 cup flour
3/4 cup sugar
2 TSP baking powder
1/2 TSP salt
1/4 cup oil
3/4 cup milk
1 TSP vanilla
1 egg
1 lime
Pineapple (fresh or canned )
1/2 stick butter
1/2 cup brown sugar

Directions:
Turn oven to 350*
1. Whisk dry ingredients
2. Add oil and milk into dry ingredients and hand whisk
3. Add vanilla and egg and hand whisk
4. Grate the rind of one lime and then juice whole lime into batter, mix well dissolving any lumps
5. Melt 1/2 stick butter into a medium-sized (9x9 pan or cast iron skillet) pan and mix in brown sugar evenly
6. Place pineapple slices in bottom of pan and pour pecans on top
7. Pour and spread batter out evenly onto top of pineapple
Bake for 45 minutes and flip onto plate while still hot
*Not the most attractive picture but I had to bring it to my grandmother's for dinner.

Bye Bye Birthday, See Ya Next Year!

It is a well known fact that I celebrate my birthday for a whole week during the month of August. It's a good thing too because my parents are divorced, my grandmother raised me, and now I am (almost) married myself with a family. I don't know how good you are at math but that means roughly 4-5 lunch/dinners and more than my fair share of cake. It just so happens that Bryan's birthday is 10 days after mine. This means I basically celebrate birthdays for 2 whole weeks!

Generally I would love this. BUT being that I am trying to drop 20 large ones, it has been a struggle. I feel like I have taken about 10 steps back. We have gone out to eat 5 or 6 times and had dinner cooked for us numerous times as well. I am so happy to get back into eating healthy and exercising. I got lots of makeup work to do!

Bryan's birthday was a success. He loved the pictures I had made for him, but how could he not?! Anything that has that sweet little face on it is the best present ever. I attempted to make him a golf-themed cake, and while I am not disappointed in the final outcome, it did not quite look how I thought it would. I told Bryan not to laugh because it looked like a five year old had made it. He told me that it would have to be a pretty talented five year old;). He's great though and he would never tell me he didn't like it or make fun of it.
Maybe next year's golf-themed cake will turn out better than the last:). I think it's safe to say I will never be a professional baker!

Thursday, August 25, 2011

Birthday Week

Another year has come and gone and I am just thankful it has. I thought I would be anxious about entering my mid-20's but really I am more concerned about getting this dang baby weight off. I could go on for paragraphs but I'll spare you the bitching and moaning. For now anyways. I had a great birthday week and the best part is that it's not over yet!


To kick off my birthday Bryan took my to Saul Good on Friday for lunch. We had a great lunch (as I blogged below) and I cannot wait to return. Bryan had a golf tournament all weekend so we really didn't do much.

Meemaw left to go camping on Sunday morning in the Great Smoky Mountains, and I had told her we would join her for a night. Bryan made sure to have a short day on Monday and we left that afternoon. Though I was upset because we ended up leaving later than planned we still got there with enough day light to set up the tent and enjoy the mountain stream.


As a child we went camping most summers up until I was about 12. Then we stopped. I think we stopped because my Great-grandfather got sick, but I have been eager to continue this camping tradition for years. We even reserved a spot at the same campsite we camped at when I was young; a beautiful little site called Elkmont. It is about 6 miles up in the Smokies from downtown Gatlinburg. We had lots of fun hanging out and cooking s'mores over the fire. I bit off more than I could chew by making breakfast the next morning over the campfire. I'm not talking any breakfast, I'm talking eggs, bacon, and pancakes. FYI: cooking pancakes over a campfire is a disaster. I still got it done though and everyone seemed to enjoy it.


We went on a fun little nature hike that afternoon before we left and found the most beautiful old cabin. It had a 2-story tall stone fireplace and was right on the mountain stream. The place hadn't had anyone living in it for years though. It was a shell of a once beautiful house. It actually made me sad that someone had to give this gem up. You would have to drag my dead body outta there! No one has been allowed to reside in the state park since the late 80's, early 90's. Anyone still living there after a certain date had be removed legally.
*I have pictures of the house I promise I'll post soon. I am having trouble d/l'ing them from my email to my MacBook.

On Wednesday Bryan took me to Carrabba's for my birthday dinner. His sister, Kristin, and her boyfriend, David, joined us for the feast. To my delight Wednesday is $10 off bottles of wine and sangria. We took advantage of this deal and shared a pitcher of yummy red sangria. I ordered the pesto basil salmon and he had a sirloin marsala and Chicken Bryan combo. I usually order the Chicken Trio, but I was trying to be healthy(er) by ordering the salmon. Bryan said his meal was one of the best he had ever had and I was pretty satisfied with mine. We skipped dessert so that we could go home and grub on leftover ice cream cake that his parents had gotten me for my birthday.
(Those DANG maternity jeans make yet another appearance)

I wanted to post some recipes in my blog this week but I haven't cooked one time yet! I even had to put some meat BACK in the freezer so that it wouldn't go bad. I'll be back at it next week though. I am going to start making my own baby food tomorrow so I'll let you know how that goes and I'll post some recipes and how-to's. My little guy seems to be picky so wish me luck!
I wanna Happy Meal mom!


It's Saul Good


Last Friday as an early birthday lunch Bryan took me to Saul Good Restaurant and Pub. I had dinned there a few years a go when it first opened and I was not very impressed with what I got and it has taken me a few years to try it again and boy am I glad I did! It was delish!

I'm all for second chances. I figure I gave Bryan a second chance and he turned out to be awesome the second time around so giving Saul Good a second chance was the least I could do. Plus their zebra pring awning is pretty cute. I love restaurants that are privately owned and not chains. There are only a few here Lexington compared to other larger cities. Saul Good is one of the few that aren't chains.

Their menu is quite unique for the Lexington, Kentucky palate. As I stated before Lexington is over-saturated with chain restaurants. I have nothing against chain restaurants. Carrabba's and Bonefish happen to be two of my favorite, but nothing can beat a great little privately-owned spot. Their menu is made up of an eclectic take on dishes, such as the southern chicken and waffles and Parisian pizza. You can find chocolate popcorn and fondue on their dessert menu. Their steak and beer cheese nachos are a must-try for my next visit.


We shared the Saul Meat pizza, Buffalo Chicken appetizer, and their yummy White chocolate cheesecake. The pizza was amazing. It had bits of pepperoni, sausage, tomato sauce on a thin crust. I am a HUGE buffalo anything fan. Put buffalo sauce on it and I will most likely devour it. So naturally we chose their buffalo chicken appetizer. I really enjoyed the taste of the sauce and it wasn't too hot so it could appeal to a palate that wasn't a fan of spicy hot foods. I pretty much let him chose the cheesecake. I figured I am not a big white chocolate fan so I would be safe with a bite or 2. I was wrong. It was so creamy and delicious that I think I ate more than he did.

All-in-all I was satisfied with our meal and will definitely return and very soon. I know a lot of people in the area have already been here, but if you  haven't it's a place you should add to your list.

Sunday, August 21, 2011

The Fruit of My Garden

When I started dating Bryan he lived in a spacious studio apartment. It had everything the two of us needed-a bathroom, 1 bedroom, and a kitchen, all which totaled about 500 sq. ft. Now we reside in a small, very small 1,200 sq. ft. 2 bedroom apartment. It's funny how one small little baby can make your space seem so much smaller than before. His stuff is EVERYWHERE. Today for instance, as we were getting ready for a walk I said, "grab the stroller out of the bathroom, please." Yes, we store diapers, wipes, baby tubs, toys, clothes, and the stroller in our spare bathroom.


I am not much of a gardener. In fact I am quite sure that if I had flowers in my yard they would all die. However, I am a fan of gardens. The type that produces actual food. My great grandparents have had a garden for as long as I can remember. For as long as I can remember I did not appreciate all the fresh fruits and vegetables it produced. But since we have lived here the past 6 years I have really enjoyed having a garden all summer. It is so cost effective to have your own garden and I really enjoy cooking with vegetables that I know where they came from.


These two paragraphs seem to have nothing in common but the point I was trying to make is if I had a house with a yard I would definitely grow my own garden. Unfortunately my apartment is far too small to farm a garden every spring. I long for the days when we own our own house so that I can hoe my garden. For now though I must go to my grandmother's to get my garden fix.


Soup mixes are one of the great things that gardens produce. Grab every vegetable from the garden to make your own soup mix to freeze for the coming winter. Here in Kentucky it stays cold for a long time and warm soups are nice to have. Okra, potatoes, green peppers, onions, squash, tomatoes can all be cut up and canned or placed in freezer bags and stored in the freezer. You can cater the soup mixes to your taste as well by adding as much or as little as you want. When that cold air of winter creeps around just reach in your freezer (or cabinet if canned) and place in the crock pot. Add water and canned tomatoes for a delicious home made soup that is not only satisfying, but good for you.


Another great plus of having a garden is all the tomatoes it produces. Admittedly I am not the biggest raw tomato fan. I do however love it in soups and sauces. I'll even eat a grilled tomato. I guess it's just something about the cold texture. Every year my great grandmother would boil and peel the tomatoes in order to can enough tomatoes until next spring. This is great because you have something fresh and homemade that doesn't take all that much effort. The cans you buy in the store are very convenient and loaded with sodium. You can use the canned tomatoes in soups, chili, and it makes a mean salsa.


If you don't have a garden another quick way to get fresh tomatoes is to buy them from the store. I always buy organic, but you can buy whatever you prefer. Tonight I  made chili. I diced about 4 roma tomatoes and tossed another three in the food processor to make it into a liquid. I added that to my ground beef instead of a can from the store and seasoned it to my preference. An easy red Italian sauce can be made by blending your tomatoes in the processor with fresh garlic and basil. Add your own seasonings to taste (I prefer a little italian seasonings and pepper), heat it on the stove and serve over pasta.

Oh Sweet, Sweet Summer, Where Have You Gone? A White Bean Salad Perfect Anytime

Hola my friends! I am quite sad that my summer is almost over. Not that I have to go back to school or anything, I just dread the whole 7-months-of-cold-weather thing. I do enjoy a little big of the cooler fall weather but after that I am ready for warmth again. Unfortunately all I get is cold, cold, cold.


The end of August brings a few fun milestones, some bittersweet. My birthday is on Tuesday. I am happily entering my late twenties (27) with open arms. I really don't mind aging as much as I thought I would. My baby boy just turned 4 months old yesterday! Four freaking months old! I am going to be a case of tears on his first birthday, I just know it. I feel like it was yesterday that that the doctor was telling me to "just push through the ring of fire". If you have already birthed a child naturally then you know what I'm talking about! If haven't yet experienced the joy of childbirth then you are quite lucky my friend.


My love has a birthday coming up on September 2nd and honestly I am looking more forward to his than mine. I have SO MUCH stuff planned for his birthday. I love birthdays. I always try to make my family's individual birthdays special. I always make a cake, a special dinner, balloons, and matching themed decorations, and his will be no different. I don't want to divulge too much information yet but I'm thinking a golf themed cake and rice crispy treats. 


Many of you have already seen the pictures I had made of Bryson and I. The wonderful Ali Garey from Ali Ann photography took them. She is awesome and I highly recommend her. I absolutely cannot wait to give them to him. I am so happy that this time next year we will be MARRIED and no longer living in sin. I know my Meemaw is somewhere thanking God right now as she is reading this. I'll stop blabbing now and continue with the recipe I was going to share with you all before I got to talking.

I have had this recipe for a white bean salad made with tomato, basil, and garlic. It is so yummy. I have made it a few times for large family gatherings and holidays. It's pretty cheap to make too, especially if you grow your own basil and beans are about the cheapest protein you can buy. 

Here lately I have been preparing this staple at home. I cut the recipe in half when I am making it for just a couple of people. Bryan is not a huge fan of raw tomatoes so I get the whole thing to myself:). I like to make this when I am making anything Italian. It goes great with pan-fried french bread, kind of like a bruschetta. I am doing a very low-carb diet so I even used it as a pasta substitute in my spaghetti the other night. At lunch today I still had some left over so I added a whole can of drained tuna fish to the leftovers and it was delish. I am even thinking of adding this yummy dish to my wedding menu...

Tomato, Basil, and, White-Bean Salad
serves 6
2 cans (19 oz each) cannellini beans, drained and rinsed
1/2 lb small roma tomatoes, cut into 1-inch pieces
1/2 cup fresh basil leaves, torn into 1-inch pieces
1 teaspoon salt
Pepper to taste
1/4 cup extra-virgin olive oil
1/4 red onion, chopped into 1/2 to 1 inch pieces

1.) Combine beans, tomatoes, basil, and salt in a bowl, and season with pepper
2.) Heat oil in skillet over medium heat. Add garlic, and cook, stirring, until fragrant but not browned. 1 1/2 to 2 minutes. Pour over bean mixture, and gently toss. Let stand 30 minutes before serving to allow the flavors to melt. Salad can be covered and kept at room temperature for up to 4 hours.

Friday, August 19, 2011

Whole Chicken: A Frugal Woman's Dream

Ok, Ok, so maybe the best adjective to describe me is definitely not frugal, but at least I try. To me being frugal means buying the cutest shirt at Forever 21 for 10 bucks and a bracelet to match for $3.80. Seriously though, if you are on a budget (and we try to be!) then a whole chicken is definitely for you and your family. I loved the bang it gave my buck so much I now have a whole freezer stockpile of medium-sized whole chickens. I go the extra buck or 2 and buy the organic, hormone and range-free chicken. I like to know that my chicken was treated fairly and able to roam free before she was humanely killed for my dinner table. If you don't really care about the treatment of your chicken then buy the cheapest one you can find.


My one chicken gave my enough meat for 3 meals PLUS 2 whole cups of chicken broth. A larger chicken would give you probably 4-5 cups. I don't have a large enough crock pot for a large chicken so I just bought a smaller one. Although you could probably bake a larger one in the oven and get the same results. I personally added store bought chicken broth because I wanted to make sure I got enough to make another recipe. It would have still yielded about a cup. You can use any seasonings/herbs you have on hand. Rosemary would be great with this chicken although I had no rosemary on hand. After we finished eating the chicken for dinner I pulled off the rest of the meat and made chicken salad AND Paula Deen's chicken casserole, which just happen to use 2 cups of homemade chicken broth:) and all for under 10 bucks. So Voila! A frugal woman's dream!


Ingredients:
1 whole chicken
2 TBSP cold butter, cut into thin slices
1/2 onion, sliced into 1-1 1/2 long pieces
2 TBSP chopped chives
Salt, pepper, garlic (and any other seasonings/herbs you want to use) to taste
Chicken broth (optional)
8 oz's of whole mushrooms

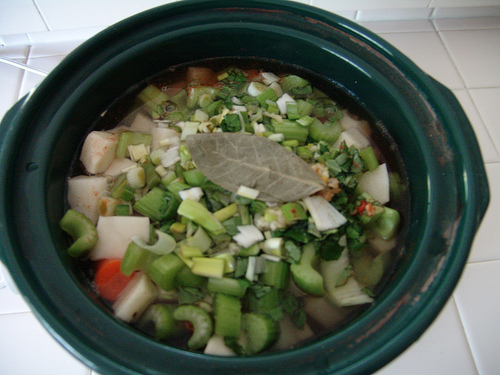
1. Turn a large crock pot on low.
2. Wash chicken and take out innards. Pat dry. Take 4-5 pieces of aluminum foil and loosely form into balls. Set in the bottom of crock pot. This is to elevate the chicken and it is supposed to make the skin more crispy.
3. Place chicken in crock pot and gently pull up the skin of the chicken without removing the skin. Place pats of butter under the skin along with 1/4 of your onion slices
4. Season the outside liberally (you can also carefully season under the skin), add chives, and place the rest of the onion slices on top. It is OK if some of the onion falls to the bottom of the pot.
5. You can leave your mushrooms whole or quarter them if you want. Place them in the bottom of the pan, along the sides of the chicken.
6. Pour a 1/2 cup to a cup of chicken broth in the bottom of the pan. This is optional. I wanted a moist, juicy chicken with lots of broth. Cook overnight or all day (at least 7 hours). Use leftovers to make chicken salad, casserole, or any other varieties of chicken dishes. Below is the recipe for Paula Deen's chicken casserole...
*The onions and mushrooms were soooo yummy cooked in the chicken's natural juices.


Paula Deen's Biscuit-Topped Chicken Cobbler
Serves 8-10 (again I cut recipe in half)
*Next time I prepare this recipe I will DEFINITELY cook the biscuits separately because I felt that it absorbed a lot of the casserole.
1/2 cup butter, divided
1 cup chopped celery
1 cup chopped carrots
1 cup chopped onion
1 (8-oz) package sliced fresh mushrooms
1 cup frozen peas, thawed (I omitted the peas)
2/3 cup all-purpose flower
4 cups reserved chicken broth
1/2 cup heavy whipping cream
4 cups reserved chopped cooked chicken
1 TBSP minced fresh thyme (omitted)
1 1/2 TSP salt
1 TSP black pepper
2 (7.5-oz) bags complete buttermilk biscuit mix
1 cup shredded parmesan cheese (I used 1/2 parm, 1/2 cheddar)
1 cup whole milk

1.) Preheat oven to 400*. Spray 13x9 inch baking dish with nonstick cooking spray.
2.) In a large skillet, melt 1/4 cup butter over medium-high heat. Add celery, carrots, onion, and mushrooms; cook 5-6 minutes or until tender; stir in peas. Set aside.
3.) In a large dutch oven, melt remaining 1/4 cup butter over medium heat. Add flour, and cook, stirring constantly, for 2 minutes. Add chicken broth, cream, whisking until smooth. Cook, whisking constantly, for 3-4 minutes or until mixture is thickened.
4.) Add reserved chicken, celery mixture, thyme, salt, and pepper to broth mixture. Spoon mixture into prepared baking dish.
5.) in a medium bowl, combine biscuit mix, cheese, and milk, stirring just until combined. Drop dough by heaping TBSP's onto cobbler (or baking dish if your want to cook separately). Bake for 18-23 minutes or until biscuits are golden brown and cobbler is hot and bubbly.

This recipe was seriously DELISH! The cheddar biscuits were amazing and they reminded me of the ones you get at Red Lobster.


Ham and Spinach Strata!

I try to keep things simple over at my house. There are a few things I have found while experimenting in the kitchen the past few years; lesson 1) if it seems too complicated it probably is. For example, I tried to make this eggplant parmesan recipe I found in my SHAPE magazine recently. It said "soak your eggplant in water for 30 minutes and then let dry on paper towels. Then dredge one side in bread crumbs....". Being that I am not really even a huge fan of eggplant I decided to just stop there and not even continue to read any further. I didn't like eggplant enough to let it soak in water.
 2) Some things are better in a  package. Case in point: While watching Buddy cook banana pudding on Kitchen Boss I decided that I wanted to try. Long story short I ended up making the banana pudding FROM SCRATCH and ended up in tears both times. I whisked that stupid pudding for like 30 minutes (he only did it for 4-5 minutes) and it STILL wasn't thickened. Basically the box pudding is quick, easy, good, won't make you cry, and will save 4 hours trying to make it from scratch.
3) Just keep it simple. I feel like the meals that save me time and money are sometimes my best meals. I tried to make crab cakes one time from scratch and failed miserably. I spent about, oh, 40 big ones trying to make them too. I cried that night too. BUT I was 6 months preggo so at least I had an excuse...

I constituted all my rules cooking tonight's meal-a ham and spinach strata. I'll first start with the definition so that you can better understand the foundation of a strata if you have never heard of one (my Meemaw had not).
Strata:
1. A layer or series of rocks in the ground.
2. A thin layer within any structure.
3. A very yummy breakfast casserole consisting of  eggs and bread.

Basically my ham and spinach strata consists of layers of some of my favorite foods-ham, onions, cheese, garlic, and of course, bread and eggs. I prepared it the night before and stored it in the fridge until I was ready to cook it for dinner. It would be a great breakfast dish too (obviously). This recipe is a good frugal staple and would be a great meal prepared from holiday leftovers, like turkey or ham and day-old bread. I love meals that are quick, can be prepared ahead of time, and only consist of ONE dish to wash afterwards:).

The beauty of this dish is the fact that you can pretty much put any vegetable, cheese, bread, and meat combo in it. I used what was in my fridge which was onions, spinach, cheese, and ham. I personally used a little more bread and cheese than the recipe called for. Paula Deen says that you should always follow a new recipe to the T the first time you make it and then experiment the second time around. I always try to stick to my recipe but I always add a little more of my favorite ingredients than the recipe calls for. I say if you really love a certain food then you can never have enough! Here is the recipe. I hope you enjoy!

Ham and Spinach Strata
Serves 8-10
1 TBSP butter, unsalted (room temp)
10 large eggs
2 1/2 cups of whole mild
1 TBSP Dijon mustard
1 TSP chili powder
1 TSP salt
Pepper to taste
1 loaf of bread (preferably day old bread), cut into 1-inch pieces
1 lb ham (deli or holiday), cut into bite-sized pieces.
1 medium-sized onion, diced
2 cups of washed spinach, torn into 1 inch pieces
8 ounces pepper jack cheese, shredded

Directions:
Heat oven to 350*
1. Place bread on a baking sheet and bake for 10 minutes or until lightly toasted.
2. Butter a 2 1/2 to 3-quart baking dish. In a large bowl, whisk together eggs, milk, chili powder, salt, pepper,  and Dijon. Add bread when done baking.
3. Cook onions in a skillet on medium heat until tender. Add spinach towards the end and cook until spinach is soft and wilted.
4. Add onions, spinach, and ham to egg mixture and mix well.
5. Carefully pour mixture into greased baking dish. Cover and refrigerate overnight (or at least a few hours).
6. Pre-heat the oven to 350*. Pull Strata out of fridge and let sit for 15 minutes. Bake the strata, uncovered, until puffed and lightly golden brown, about 1 hour to 1 hour and 20 minutes. Let rest for 5 minutes before serving.
* I cut recipe in half but added 1 more egg (6 total) and about a half loaf of bread.


Monday, January 17, 2011

Baked Tilapia!

I wasn't planning on blogging about the dinner I cooked tonight, but it was so good I just had to share my recipe. I bought fresh tilapia from Whole Foods Market when it was on sale the other day. I coated it with cracker crumbs, parmesan cheese, salt, pepper, parsley, and garlic. I served it with some yummy risotto, steamed broccoli, and twice baked potatoes. I normally wouldn't serve 2 starches in one meal, but my fiance can put away some food! He doesn't even call it a meal if it doesnt have at least one meat, starch, vegtable, salad, and bread.

Heat oven to 350-375
3 pieces of tilapia
1/2 package of crackers
1/4 cup parmesan cheese
salt/pepper
garlic powder
parsley flakes


2 eggs (beaten)
1/4 lemon
flour

2-3 tablespoons butter (melted). You can subsitute olive oil for butter. For my filet I omitted this step for personal dietary preferences.

1. crush package of crackers into crumbs and place into a sandwich bag
-add parmesan
-salt/pepper
-garlic powder
-parsley flakes
Shake ingredients up and then pour into a dish that is at least 1 inch deep
2. beat 2 eggs
-add lemon juice
(can add milk/buttermilk if desired)
-place into a dish that is at least 1 inch deep
3. place about 1/8 cup flour onto a separate plate
4. form an assembly line-flour first, then egg wash, and last should be the bread crumbs
5. cover counter space with seran wrap (easy cleanup)
6. unwrap each filet and season with salt pepper
7. lightly coat with flour
8. dip into egg wash, cover entire fliet, but make sure you let excess wash drip off
9. dip into cracker mixture, using your hands to fully coat tilapia
10. repeat steps 8 and 9 and then place onto pan
11. bake until fish turns white and flakey (10-20 minutes depending on oven and preference of doneness). Check on fish and right before it reaches desired doneness pour butter mixture on top of each filet. Let it broil unti the crust on fish turns a golden brown.
12. Remove from oven and serve with desired sides.

Yummy!

Wednesday, January 12, 2011

Smashing Tomato

I am taking a break from blogging about weddings to blog about food, and not just any food, but one of my favorite restaurants in Lexington-Smashing Tomato. I love this place. Seriously. It is some of the best pizza I have had. My fiance's friend, Ben, who has lived in Italy for a few years, says that Smashing Tomato has the most authentic Italian pizza in the states. They use some authentic Italian style wood-burning stove that bakes their pizza to perfection. Their Neopolitan style pizzas range from their Margherita, topped with fresh basil and imported buffalo mozzerella, to one of my favorites, the Quatro Formaggi (4 cheese). This pizza is loaded wtih mozzarella, provolone, pecorino, and gorgonzola.

Smashing Tomato doesn't just stop there with pizza; they also feature two amazing salads. One is a ceasar and the other, my favorite, is a chopped salad loaded with fresh romaine, red onion (I love red onions), walnuts, parmesean cheese, and then topped with their balsalmic dressing. On the side comes a yummy piece of bread that is pretty much a pizza crust with no toppings. I try to not touch it (sometimes that doesn't work), but it works great as a tool to help you shovel the crisp salad into your mouth. If you go wtih a a friend or a group then I would recommend trying their hot artichoke dip as a starter. This hot and creamy dip is delicious on their freshly baked bread. Oh, and the best part about this place? You don't have to tip. It's kinda like a Panera Bread with pizza. Make sure you go before 3 p.m. You get the lunch special with a small pizza and salad for $5.99. I already know where I'm headed for lunch tomorrow:).
http://smashingtomato.com/

Monday, January 10, 2011

Candy bars...not the Hershey kind

I love this idea. It is probably one of the things I am most exicted for regarding my upcoming wedding ceremony. I am on a mission to find cute mismatched apocathary jars to house the many pounds of candy I will need to feed 150 guests. Of course all of the candy I use will match my wedding colors. I came up with this idea as I was trying to comeup with ideas for wedding favors. I thought this was a cute idea and I can't wait to see it in action!